(Note: sorry about the lack of updates for a while, because I had been locked out my account by getting a new phone and wiping my computer. I was good about doing most backups, but apprently not all of them. The folks at WordPress were most helpful. Thanks!)
Fieldwork ended abruptly this season with a cold spell and then a lot of rain in Western Oregon. With the end of field season comes a lot of preparing reports and attending conferences. When I can’t stare at MS Office anymore, I mess around in the lab taking pictures.
Earlier this month, I had the chance to meet up with Thomas Shahan, the image specialist at Oregon Department of Agriculture. He does incredible work with insect photography and illustration. In addition, he’s also a friendly guy.
I wanted to talk with him so that I could improve the images that I am putting together with Zerene Stacker, my focus stacked photography software of choice. I think it’s simple and straightforward, and I am happy with the results, generally. I have seem some incredibly sharp images that I am just not able to achieve, and I wondered where I might be going wrong when trying to make my photographs. In short, there were three tips that he focused on:
1) Use the highest quality images you can. That means shooting in RAW, and outputting TIFs to use in Zerene. Crap in, crap out. I’d been shooting with the largest JPEGs because of limited storage space and processing time, so I was immediately sacrificing quality.
2) Lighting is VERY important. Whether it’s direct or diffused, the numbers of sources and the type of light (constant versus flash) all make a difference. Pay careful attention to how you are lighting your subject, and remember what you are trying to show (texture, depth, or shape, for example). Photography is the art of using light to tell a story. I had considered lighting a little before, but hadn’t experimented too much with constant light versus flashes, or much with different types of diffusers. All of Thomas’s were homemade using pieces of mylar, vellum, or plastic.
3) Post-process. Take the time to edit the images afterwards. Adjust white balance, sharpness, retouch with the originals, etc. This is something I really neglected, mostly because I am still excited by the novelty of stacked images and I think they all look cool coming out of the software, and it’s hard for me to see where to improve. Another reason is laziness.
 Something that you should notice about these tips is that they apply to all of digital photography in general. It’s next to impossible to get a good shot right out the camera. These are the tips that I give to people when they ask me how they can improve their photos. One is understanding the limitations of your equipment. 2 is that you need a lot of light to prevent blurry pictures. 3 is doing lighting adjustments or cropping afterwards. Many people don’t realize that they already post-process with Instagram, and that you can take the time to use other programs and have more control over what your images look like.
The system that I have in the lab where I work is not a the fanciest rail stacking system, but it’s pretty good. It’s a midrange Leica stereo dissecting scope with a C
anon T2i mouted on the document tube. To do the focus stacking, I have to move the focus by hand, there’s no automation. I can use the notches between the fine and coarse focus knobs. For light, we have a few microscope fiber optic light sources, but no flashes or anything like that. Compared to a lot of setups, we’re limited, but we’ve been able to get a lot of good images, and one of the images that I took of an extinct heteropteran in amber was used in a publication by Dr. Poinar. We think it’s pretty good for our needs (another consideration of making images: how will people see them and why? Do you need a 500MB tif for a PPT?)
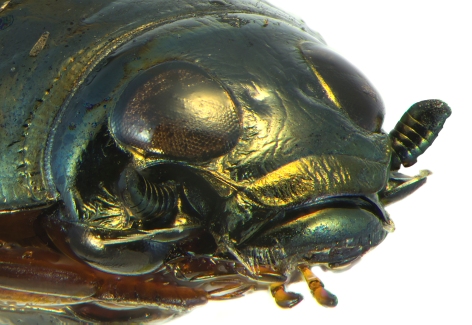
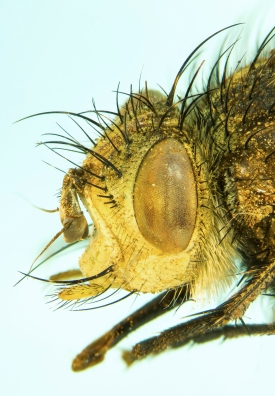
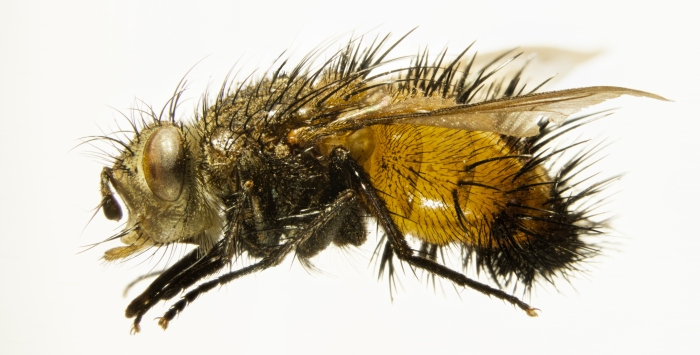
The images in the post are some that I made this week using some older mounted specimens. Already I have been able to see improvements. Just using RAW imaged has increased the sharpness of the images a lot (compound eyes show a lot more detail) and increasing the lighting has made for warmer, more interesting shots. I also took a lot of time to get rid of ghosting around the edges, clean up some dirt particles, and improve detail in the dark areas. I encourage you to click on them to look at the full-res JPEG outputs.
About the images: the fly is a Tachinidae, a family of flies that lays eggs on the outside (and sometimes internally) on a prey insect. Those eggs hatch and
the fly larvae consume the host. It’s a huge family that attack many different kinds of insects. They can be very generalist or very host specific. In the past, they have been used as biological control agents. The beetle is a Gyrinidae, commonly called a whirligig beetle, which live in water. The adults’ eyes are bisected, so that they have one set above the surface of the water, and another below, as you can see in the picture (the flat dome on the underside, bottom left of the picture.) Got any tips? Please leave them in the comments.


